
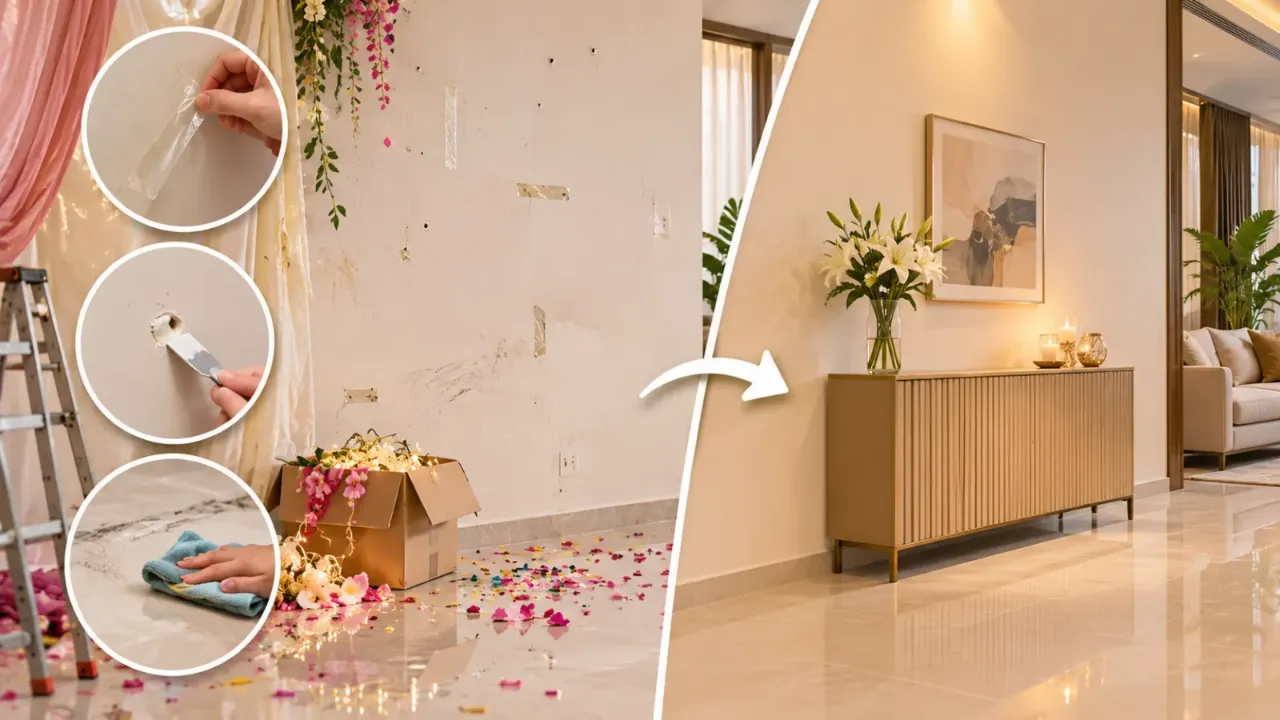
After the Wedding: Restoring Walls and Floors Without a Repaint
A wedding can transform an ordinary home or venue into a celebration space, but once the guests leave and the decorations come down, the aftermath can be surprisingly difficult to manage. Walls may have tape marks, floors can have food stains, furniture may show scratches, and areas around the entrance can accumulate dirt and scuff marks.
The good news is that not every mark requires repainting or replacing the flooring. With the right cleaning methods, a little surface repair and careful attention to materials, many post-wedding messes can be dealt with without a major renovation.
This guide explains how to assess the damage, clean different surfaces safely and decide when a small repair is enough.
1. Assess the Damage Before You Start Cleaning
Before reaching for cleaning products, inspect the walls and floors carefully. Different types of marks require different treatments, and using the wrong product can make the damage worse.
Start by identifying the problem areas:
- Adhesive residue from tape, hooks and decorative stickers.
- Scuff marks from footwear, furniture and equipment.
- Food and beverage stains near dining areas.
- Wax or oil marks from candles and decorative lamps.
- Dust and dirt around entrances and high-traffic areas.
- Scratches caused by moving furniture or temporary installations.
- Stains around electrical switches, door frames and skirting boards.
Separate surface dirt from actual damage. A dusty wall may need only gentle wiping, whereas a chipped paint layer or scratched floor finish may require a small repair.
Take photographs before cleaning if you are dealing with a rented venue or a property that needs to be handed back to its owner.
2. Remove Tape and Adhesive Marks From Painted Walls
One of the most common problems after wedding decorations are removed is sticky residue left behind by double-sided tape, hooks, banners and decorative attachments.
The first rule is to avoid pulling or scraping aggressively. Painted surfaces can lose their finish when adhesive is removed carelessly.
Try this approach:
- Gently peel away any loose tape, keeping it close and parallel to the wall rather than pulling it sharply outward.
- If the tape is firmly attached, use a hairdryer on a low setting for a short period to soften the adhesive.
- Slowly lift the tape using your fingers or a suitable plastic card.
- If residue remains, use a cleaning method approved for that particular paint finish.
- Wipe gently with a clean, slightly damp cloth if appropriate.
Always test an inconspicuous area first. If the paint starts lifting or flaking, stop immediately.
Avoid using strong solvents, metal scrapers or excessive heat on painted walls. Even adhesive removers can damage the paint, so check the product instructions before use.
For future events, use decoration-friendly removable hooks or low-tack tapes that are suitable for the wall finish. Test them in advance rather than assuming that every removable adhesive is safe.
3. Clean Scuff Marks and Shoe Marks From Walls
Footwear, luggage, chairs and temporary event equipment can leave dark marks on walls, particularly near entrances, corridors and seating areas.
For light marks, start with the gentlest method:
- Remove loose dust with a dry microfibre cloth.
- Use a soft cloth lightly dampened with clean water.
- If necessary, try a small amount of mild soap diluted in water.
- Wipe gently without repeatedly rubbing the same spot.
- Remove any soap residue with a separate clean, damp cloth.
- Allow the area to dry naturally.
For stubborn marks, a suitable wall-cleaning sponge or other manufacturer-approved cleaning product may help. However, abrasive sponges and melamine cleaning pads can alter the sheen or remove paint, especially on matte finishes.
If a mark remains after gentle cleaning, do not keep scrubbing. The paint may have become polished or damaged rather than simply dirty. A small touch-up may be more appropriate than further cleaning.
4. Remove Food and Beverage Stains From Floors
Wedding celebrations often involve food counters, drink stations and guest movement across the venue. These areas can develop sticky patches, grease marks and dried spills.
The correct cleaning method depends on the flooring material.
Ceramic and Porcelain Tiles
- Sweep or vacuum loose dirt first.
- Use a suitable neutral floor cleaner diluted according to its instructions.
- Wipe the surface with a soft mop or cloth.
- Pay attention to grout lines where spills can collect.
- Rinse if required by the cleaner's instructions and dry the floor.
Avoid using rough metal scrubbers that can scratch the tile surface or damage the grout.
Marble and Natural Stone
Marble and other natural stones need more careful treatment.
- Blot fresh spills instead of spreading them.
- Use a cleaner specifically designed for the stone.
- Avoid acidic products such as vinegar and lemon-based cleaners.
- Do not use abrasive powders or harsh household chemicals.
- Dry the surface after cleaning.
Acidic cleaners can dull or etch natural stone, leaving marks that ordinary cleaning cannot reverse.
Wooden Flooring
Wood flooring should not be treated like ceramic tile.
- Remove loose dust with a soft broom or suitable vacuum attachment.
- Wipe spills promptly with a dry or slightly damp cloth.
- Use only a cleaner approved for the flooring's finish.
- Avoid soaking the floor or allowing water to collect.
- Do not use steam cleaners unless the flooring manufacturer specifically permits them.
Excess moisture can cause swelling, warping and damage to the finish.
Vinyl and Laminate Flooring
For vinyl and laminate, use a cleaner recommended by the manufacturer.
- Remove loose dirt before mopping.
- Use a well-wrung mop rather than pouring water directly onto the floor.
- Avoid abrasive scrubbing pads.
- Dry any areas where liquid has collected.
The main objective is to remove the stain without damaging the protective surface layer.
5. Deal With Candle Wax, Oil and Decorative Residue
Candles, diyas, decorative lamps and food stations can leave behind wax and oily patches.
Candle Wax
Allow the wax to harden before attempting to remove it. Gently lift the hardened material using a plastic scraper, taking care not to scratch the floor.
The remaining residue should be cleaned using a method suitable for the specific flooring material. Avoid applying excessive heat, especially on laminate, vinyl, polished surfaces or wooden flooring.
Oil and Grease
Blot fresh oil with an absorbent cloth or paper towel. Do not rub it across a larger area.
Use a compatible neutral cleaner for the flooring and follow the manufacturer's instructions. If the stain has penetrated porous stone, grout or unfinished wood, professional treatment may be needed.
Rangoli and Decorative Powder
Remove loose powder gently using a soft broom or vacuum attachment. Avoid adding water immediately, as some coloured powders can spread and leave a larger stain.
For remaining marks, test a suitable cleaner on a hidden area before treating the visible surface.
6. Restore Grout Lines and Floor Edges
Grout lines often show the effects of a busy wedding more clearly than the tiles themselves. Food spills, footwear and dust can collect in the joints, making an otherwise clean floor appear dirty.
To improve their appearance:
- Remove loose dirt with a soft brush or vacuum.
- Use a grout cleaner suitable for the tile and grout type.
- Apply it according to the product instructions.
- Use a soft nylon brush where gentle agitation is required.
- Rinse or wipe away residue as directed.
- Allow the area to dry completely.
Avoid aggressive scrubbing or strong chemicals unless the product is confirmed as suitable for the material.
If grout is cracked, missing or permanently discoloured, cleaning alone may not be enough. Regrouting or professional repair may be a better solution.
7. Check for Scratches, Chips and Small Surface Damage
Not every problem after a wedding is a stain. Moving sofas, stage furniture, decorative frames and heavy equipment can leave scratches or chips.
Before attempting a repair, check whether the damage is limited to the surface finish or has affected the underlying material.
Minor Wall Chips
Small paint chips can sometimes be repaired without repainting the entire wall.
- Remove loose paint around the damaged area.
- Fill small imperfections with a suitable wall filler.
- Allow it to dry as directed.
- Sand gently if required.
- Apply a matching touch-up paint.
For a neat result, use paint with the same colour and sheen as the original wall finish. Touch-ups may still be visible if the paint has faded or the surrounding surface has aged.
Minor Floor Scratches
The repair depends on the floor type.
- For ceramic tiles, small surface marks may be removable with a suitable tile-safe cleaner.
- For natural stone, scratches or dull patches may require professional honing or polishing.
- For wooden floors, use a repair product compatible with the existing finish.
- For laminate and vinyl, follow the manufacturer's repair recommendations.
Do not use generic polish or wax to hide scratches without checking compatibility. The wrong product can leave a slippery or uneven surface.
8. Restore Skirting Boards, Door Frames and High-Touch Areas
After a large celebration, damage is not always concentrated on the walls and floors. Skirting boards, door frames, switch plates and corners can accumulate dust, fingerprints and shoe marks.
These areas can be cleaned using a soft cloth and a suitable mild cleaner, provided the material and finish allow it.
Pay special attention to:
- Skirting boards near dining and entrance areas.
- Door frames where decorations were attached.
- Switch plates and areas around handles.
- Corners where furniture or equipment was moved.
- Floor edges beneath temporary installations.
Always switch off the relevant electrical circuit before cleaning electrical fittings where necessary, and never allow liquid to enter sockets or switches. For electrical fittings, follow the manufacturer's cleaning guidance.
9. Know When Cleaning Is Not Enough
The aim is to avoid unnecessary repainting, but not every surface can be restored through cleaning alone.
Consider professional repair if you notice:
- Paint peeling or coming away with adhesive.
- Deep scratches or cracks in flooring.
- Water damage or swelling in wooden surfaces.
- Permanent stains on porous stone.
- Large areas of chipped or missing paint.
- Dull or etched patches on marble.
- Damaged grout or loose tiles.
In such cases, a small targeted repair, polishing treatment or localised repainting may be enough. A complete renovation should be considered only when the damage is widespread or the underlying surface has failed.
10. Prevent the Same Damage at Your Next Celebration
A little preparation before the event can save considerable cleaning effort afterwards.
Use these practical precautions:
- Choose removable decoration fixings suitable for the wall surface.
- Avoid attaching heavy decorations directly to painted walls.
- Place protective mats beneath food and beverage stations.
- Use floor protection under heavy furniture and equipment.
- Keep candles and oil lamps on stable, heat-resistant trays.
- Ask decorators to use suitable floor coverings during installation and dismantling.
- Remove tape slowly rather than pulling it away sharply.
- Keep cleaning materials available for fresh spills.
If the property is rented, agree on decoration and protection arrangements with the owner or venue manager before installation begins.
Closing Thoughts
Restoring a home or venue after a wedding does not always require fresh paint, new flooring or a major renovation. Many common problems, from adhesive residue and scuff marks to food spills and surface dust, can be handled with careful cleaning and material-appropriate methods.
The most important thing is to understand what each surface can tolerate. Start gently, test cleaning products in hidden areas and avoid harsh chemicals or aggressive scrubbing. When damage goes beyond surface dirt, choose a targeted repair instead of repeatedly trying to clean it away.
A little care after the celebration can help bring the space back to its original appearance while avoiding unnecessary expense.
Explore More with Walls to Wonder
Looking to maintain, refresh or improve your interiors? Explore Walls to Wonder's AI-powered design tools to visualise room updates, explore styles and plan your next interior project.
- Whole Home Visualizer
- Design My Room
- Interior Design Cost Estimate
- Interior Quotation Checker
- Rate My Room Design
- Interior Style Finder
Discover more ideas and inspiration at Walls to Wonder.
Turn this idea into a plan for your home
Visualise your space, understand the likely budget, or find a professional who can bring the idea to life.