

Cracks, Dampness and Peeling Paint: Your Pre-Paint Checklist
A fresh coat of paint can make a home feel brighter, cleaner and more complete. But when walls start peeling a few months later, cracks reappear through the finish or damp patches return under the new colour, the problem often began before painting even started.
Choosing the right shade is only one part of a successful paint job. The condition of the wall underneath, the cause of any moisture, the quality of surface preparation and the painter's agreed scope all affect the final result.
This is especially important in Indian homes, where monsoon dampness, plumbing leaks, dusty surfaces and previous layers of paint can complicate preparation.
Before choosing wall paint design ideas or approving the first coat, inspect the surface and resolve the problems that paint cannot fix.
Here is a practical checklist to follow before the painter begins.
1. Inspect the Entire Room Before Looking at Paint Colours
Walk around the room in good daylight. Examine each wall from different angles rather than checking only the most visible areas.
Look near window frames, corners, skirting boards, switches, ceilings and the areas behind furniture. These places can reveal damage or discolouration that may not be obvious from the centre of the room.
Make a list of the walls that need attention. Take photographs of visible defects and mark their approximate locations. This makes it easier to discuss repairs with the painter and compare the condition of the walls before and after the work.
Also check ceilings, door frames, window frames and other surfaces included in the painting scope. Do not assume they are automatically part of the quotation.
The objective at this stage is to understand what the room needs—not to decide immediately which colour to use.
2. Check for Dampness and Water Damage First
Moisture is one of the most important issues to investigate before painting. Applying paint over a damp surface can lead to blistering, peeling, discolouration or recurring patches.
Look for yellowish or brown stains, bubbled paint, white powdery deposits, musty smells and areas that remain damp. Pay particular attention to walls adjoining bathrooms, kitchens, balconies, exterior walls and plumbing lines.
A stain does not always reveal its cause. Water may be entering through a leak, damaged waterproofing, rain exposure, condensation or another source.
Do not simply cover a damp patch with primer and fresh paint. Identify and address the underlying cause first. The wall must be sufficiently dry before the appropriate repairs and paint system are applied.
If moisture keeps returning, the source is unclear or the damage is extensive, get a suitable professional to investigate before proceeding.
3. Look for Cracks, Peeling Paint and Loose Plaster
Not all wall defects are the same, so they should not all be repaired in the same way.
Hairline cracks, small nail holes, peeling paint, loose plaster and wider cracks each need to be assessed before preparation begins.
Check whether existing paint flakes when lightly disturbed, whether plaster feels loose, and whether cracks appear to be widening or returning after earlier repairs.
Small, stable surface imperfections may be suitable for routine filling and preparation. However, wide, recurring or diagonal cracks—particularly around openings or alongside visible movement—should be assessed by a qualified professional before they are simply filled and painted.
Also look for powdery deposits sometimes called efflorescence. These can indicate moisture moving through masonry and carrying soluble salts to the surface. The cause should be assessed rather than concealed beneath another coat.
The painter should understand which defects can be handled through ordinary preparation and which need separate repairs.
4. Check the Existing Paint, Plaster and Surface Smoothness
The condition of the existing coating affects how well the new finish will look and adhere.
Inspect for flaking, chalky residue, uneven patches, old repair marks, rough plaster and differences in texture. A freshly painted wall can still look uneven if these issues remain visible underneath.
Depending on the wall's condition, preparation may involve scraping loose material, sanding, filling imperfections, applying suitable wall putty and using an appropriate primer. Not every wall requires every step, so the preparation should be based on the actual surface and the paint system being used.
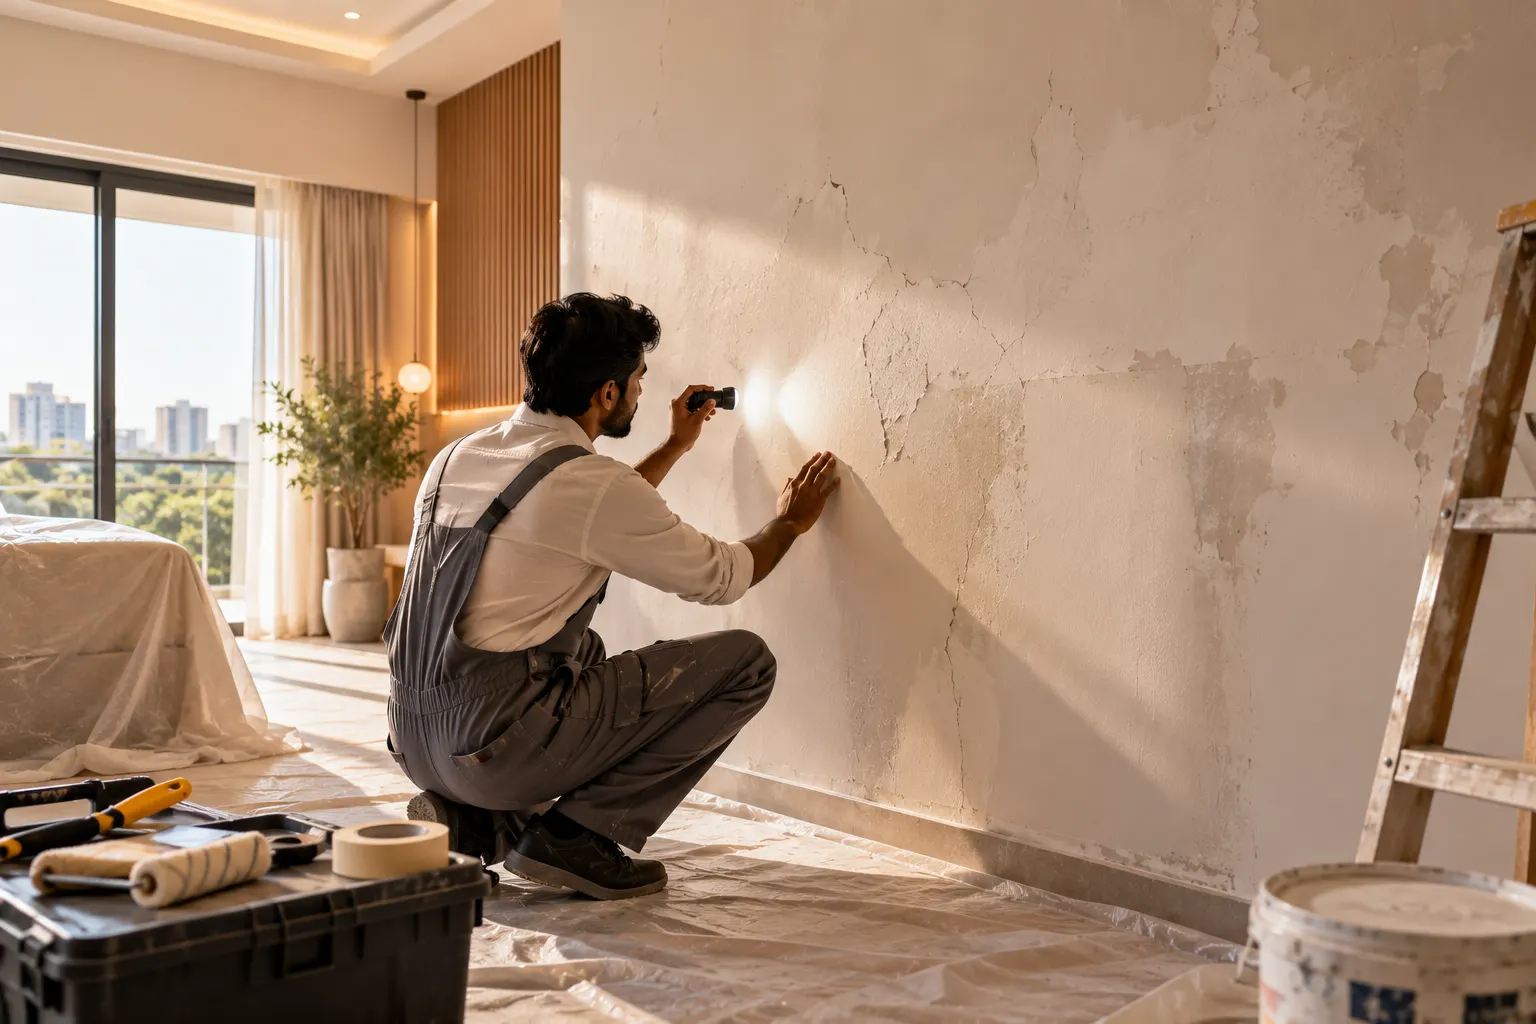
Ask the painter to explain what preparation the walls require and how the repairs will be completed. If putty or primer is included in the price, clarify the specified product and the areas where it will be applied.
Do not assume that applying more putty will automatically create a better result. The wall condition and the chosen coating system determine what preparation is appropriate.
5. Check Whether the Existing Surface Needs Special Treatment
Some surfaces require additional care before a new coating is applied.
For example, previously painted walls may have an incompatible coating, heavy chalking or several loose layers. A wall with stains may need cleaning and a suitable stain-blocking treatment after the source of the stain has been addressed.
New plaster or repair patches may need sufficient drying and curing time according to the product instructions before primer or paint is applied.
Ask your painter to check surface compatibility rather than assuming that any primer will work over every existing coating.
Where necessary, a small test area can help reveal whether the preparation and proposed paint system perform as expected before the entire room is treated.
6. Inspect Windows, Ceilings, Switchboards and Edges
A room's finish is not judged only by the large wall surfaces. Poorly finished corners, paint splashes on fittings and uneven edges around windows can make the result appear unfinished.
Before work starts, inspect:
- Window frames, door frames and the edges around skirting boards.
- Ceiling corners and the transition between the ceiling and walls.
- Areas around switches, sockets, vents and light fixtures.
- Any woodwork, metalwork or other surfaces included in the quotation.
- Existing damage to glass, flooring, hardware and furniture that needs protection.
Agree which surfaces will be painted, which will remain unchanged and how the adjacent areas will be protected.
Where electrical fittings need to be removed or isolated, have this handled safely by an appropriate professional rather than allowing painting work to proceed around unsafe or exposed connections.
7. Confirm Surface Preparation and Primer Before the First Coat
Surface preparation should be clearly understood before the painter begins.
Ask what will be scraped, sanded, filled or repaired. Confirm whether primer, putty and paint are included in the quotation, and whether any special treatment is required for stains or repaired areas.
The correct primer depends on the substrate, condition and chosen paint system. A primer should not be selected merely because it is the cheapest option or because it was used elsewhere in the house.
Also clarify how coats will be applied and how the required drying time between products will be respected. Rushing the process can affect the finish.
The purpose is not to dictate a technical method without knowing the wall. It is to make sure the painter has assessed the surface and proposed an appropriate preparation system.
8. Test Wall Colours in the Actual Room
Only after the wall's condition and preparation needs have been understood should you finalise the colour.
A paint shade can appear different under morning daylight, afternoon sun and warm evening lighting. A colour seen on a phone screen or small colour card may not look the same across an entire wall.
Apply sample patches to suitable areas and view them at different times of day. Compare them with the flooring, furniture, curtains and permanent finishes already in the room.
When comparing wall paint design ideas, consider not only the shade but also the finish. Matte, eggshell, satin and other coatings can reflect light differently and have different cleaning characteristics, depending on the product.
Do not approve the colour based on a sample seen in a showroom alone.
9. Protect the Room Before Painting Begins
Preparation also includes protecting the items that are not being painted.
Move movable furniture away from the working area where possible. Cover remaining furniture and floors, protect window hardware and mask edges that require clean paint lines.
Confirm how the painter will handle curtain rods, switch plates, light fittings, door hardware and other items around the work area. If something must be removed, agree who will do it and how it will be reinstalled.
Make sure the room has suitable ventilation for the selected products, while following the paint manufacturer's safety and application instructions.
Good protection reduces avoidable splashes and damage, but it does not replace proper surface preparation.
10. Agree on the Painting Scope Before Work Starts
Many painting disputes arise because the homeowner and painter have different expectations about what the price includes.
Before approving the work, confirm the following in writing:
- Surface preparation: What scraping, sanding, filling and repairs are included?
- Putty and primer: Which products are specified, and where will they be applied?
- Paint and finish: What brand, product range, colour and finish have been agreed?
- Coats: How many coats are included, subject to the product instructions and required coverage?
- Area and surfaces: Are ceilings, doors, frames, balconies or other areas included or excluded?
- Protection and cleanup: Who covers the furniture and flooring, removes masking and cleans up?
- Repairs and extras: How will additional defects or newly discovered damage be priced and approved?
- Timeline and payment: What are the expected start and completion dates, and when are payments due?
Use an itemised quotation rather than relying only on a total price. This makes it easier to see whether surface preparation, primer, painting and repair work are included.
A clearly agreed scope helps everyone understand what the finished work should look like.
A Quick Pre-Paint Inspection Checklist
Before giving the painter the go-ahead, confirm that you have:
- Inspected all walls, ceilings and included surfaces.
- Identified visible cracks, peeling paint, loose plaster and stains.
- Investigated dampness or recurring moisture before covering it.
- Agreed which repairs require separate professional attention.
- Confirmed the surface-preparation and primer plan.
- Tested the chosen paint colour in the actual lighting.
- Protected floors, furniture, fittings and adjacent surfaces.
- Documented the products, finish, scope, exclusions and payment terms.
You do not need to perform every technical repair yourself. The aim is to recognise issues early and ensure they are assessed by the right person before the painting work proceeds.
Plan Your Painting Project With Walls to Wonder
Good painting starts with understanding the existing room and planning the work clearly.
Use the Walls to Wonder Design My Room tool to explore colour and interior directions for your room photograph. You can also use the Interior Design Cost Estimator to help organise your broader home-improvement budget, or explore the Walls to Wonder designers directory for professional support with interior planning.
Visual tools can help you explore options, but they cannot diagnose dampness or structural damage. Have defects assessed on site and confirm the final paint system with the relevant professional.
Final Thought
A smooth paint finish depends on much more than choosing a beautiful colour. Cracks, dampness, loose paint, uneven plaster and poorly defined work can undermine the result before the first coat is even applied.
Inspect first, repair the cause of the problem, prepare the surface correctly and agree on the scope with your painter. Then choose the colour and finish that suit the room.
The best time to catch a painting problem is before it gets covered by paint.
Frequently Asked Questions
1. What should I inspect before painting a house?
Check for dampness, cracks, peeling paint, loose plaster, uneven surfaces, old coating problems and damage around windows or ceilings. Also confirm the preparation plan, products and scope of work before painting begins.
2. Should damp walls be painted after applying primer?
Not until the cause of the dampness has been identified and addressed and the wall has dried sufficiently for the specified paint system. Primer alone does not solve an ongoing moisture problem.
3. Is wall putty always necessary before painting?
No. Putty may be useful to smooth suitable surfaces and minor imperfections, but its use depends on the wall condition and paint system. Loose material, recurring dampness or significant cracks need appropriate assessment and treatment rather than simply being covered.
4. How do I know if a wall crack needs professional inspection?
Small, stable surface cracks may be routine finishing defects. Wide, recurring, diagonal or widening cracks—especially where there are signs of movement—should be assessed by a qualified professional before painting.
5. When should I finalise the wall paint colour?
After the surface condition and required preparation have been assessed, test sample colours in the actual room. View them under daylight and evening lighting and compare them with permanent finishes such as flooring, cabinetry and curtains.
6. What should a painter's quotation include?
It should clearly state the areas covered, preparation and repair work, putty and primer requirements, paint brand and finish, number of coats, exclusions, protection and cleanup responsibilities, timeline, payment terms and the procedure for approving extra work.
Turn this idea into a plan for your home
Visualise your space, understand the likely budget, or find a professional who can bring the idea to life.